Operation Starseed Starfield Quest: Complete Walkthrough and Guide

In Starfiled, the Starseed Quest stands out as a distinctive and lengthy expedition awaiting you to navigate through diverse star systems. Despite the relatively modest rewards offered in this quest, it will provide you the opportunity to obtain a variety of exclusive outfits.
This guide will walk you through Operation Starseed Starfield Quest, cover all the ins and outs, spill the details on every choice, and explain all the possible outcomes. So, make sure to read out.
Read More About: How To Make Starfield Run Better On PC [Complete Guide]
Operation Starseed Starfield Quest
The Operation Starseed quest in Starfield unravels in the isolated Charybdis star system on the planet Charybdis III. This operation presents you with multiple conclusions and rewards.
It is worth mentioning that amidst the unfolding of this quest, you will also encounter Amelia Earhart, a companion available for recruitment.
How To Start Operation Starseed Starfield Quest
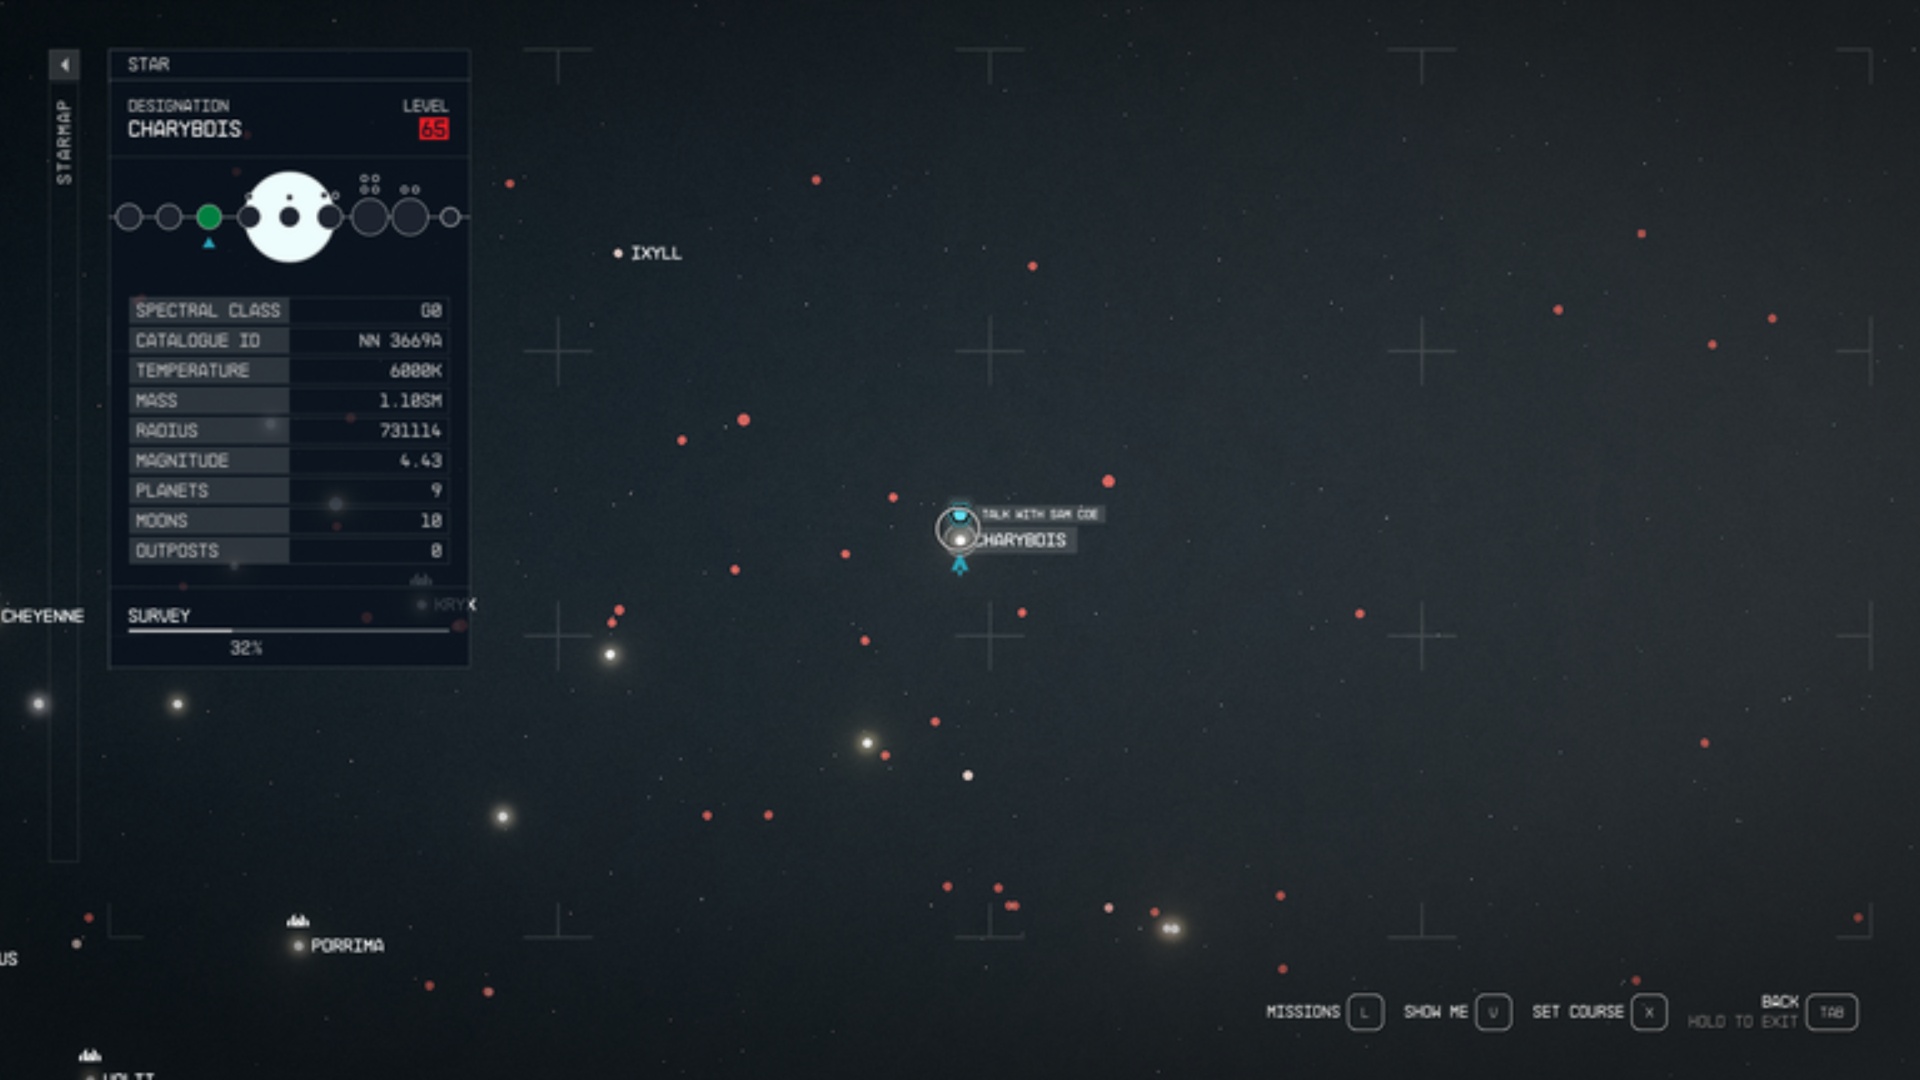
In order to start the Operation Starseed Starfield quest, you need to head towards the Charybdis III planet located in the Charybdis star system.
However, before you head to the location, make sure that your ship’s Grav Drive has the capability to cover the minimum light-year distance required for the jump to the Charybdis system.

When you enter the star system, you will receive an automated distress call from the Crucible facility on Charybdis III. It will communicate the Facility’s need for additional resources and provide you with its coordinates.
Step 1: Talk with Tobias
Once you receive the distress message, navigate the star system map and chart your course to the specified waypoint. This will lead you to the Crucible facility on Charybdis III, initiating dialogues with Tobias and Ada.
Ada will guide you to talk with Franklin to proceed following the conversations. So, you will need to reach out to the Facility to continue ahead.
Step 2: Reach The Facility In Operation Starseed
Franklin will uncover that the Crucible functions as a cloning facility, mechanically replicating renowned historical figures from Earth. However, the purpose behind this cloning endeavor remains shrouded in mystery.
Nonetheless, Franklin will disclose that the Crucible’s inhabitants are divided into three distinct societies. Although Franklin leads one of these societies, he’ll task you with meeting the leaders of the other two before divulging his own intentions.
Once your discussions with the other leaders conclude, you can circle back to Franklin to resume the dialogue. These societies include the Pragmatists, Believers, and Renegades.
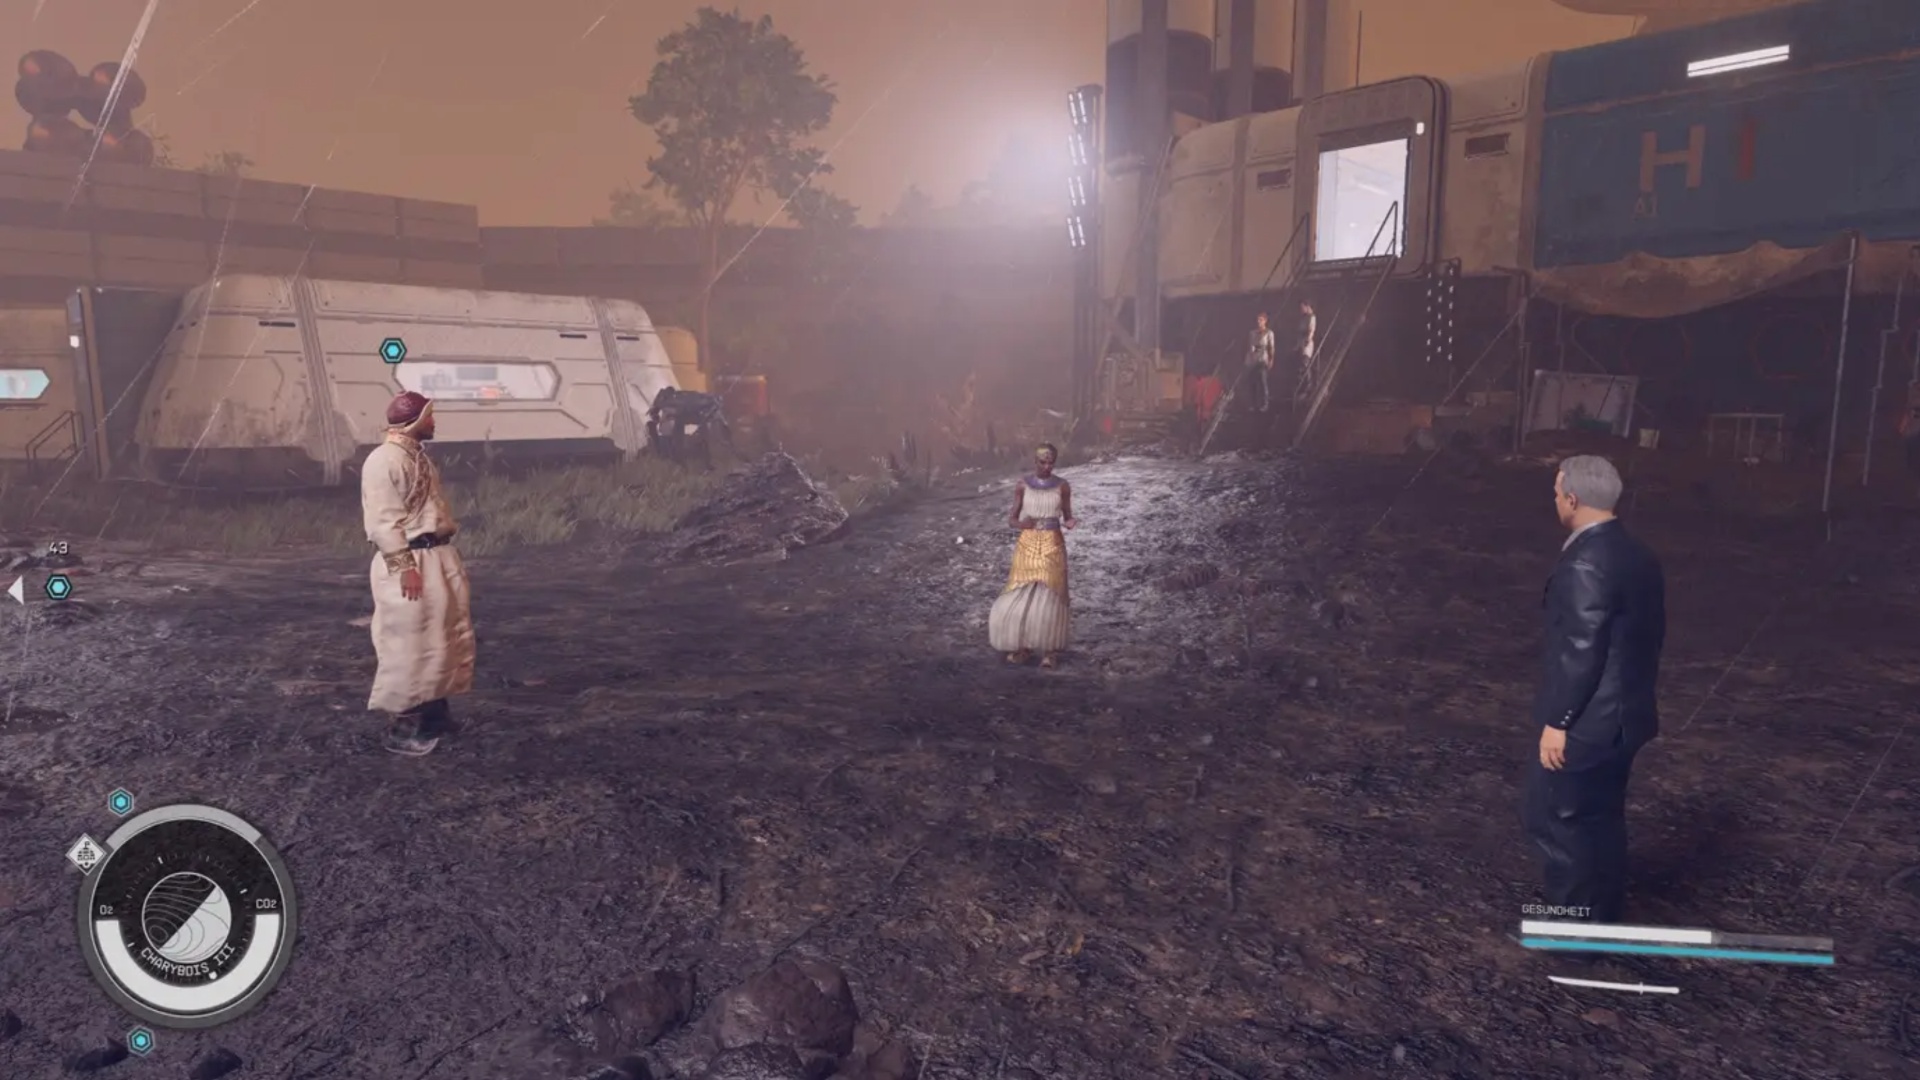
Step 3: Meet The Leaders Of The Crucible Societies
You will have to meet all three leaders of the Crucible societies to gain insights into their perspectives on the unfolding situation. Here’s a brief overview of all the leaders of the Crucible societies, their beliefs, and plans:
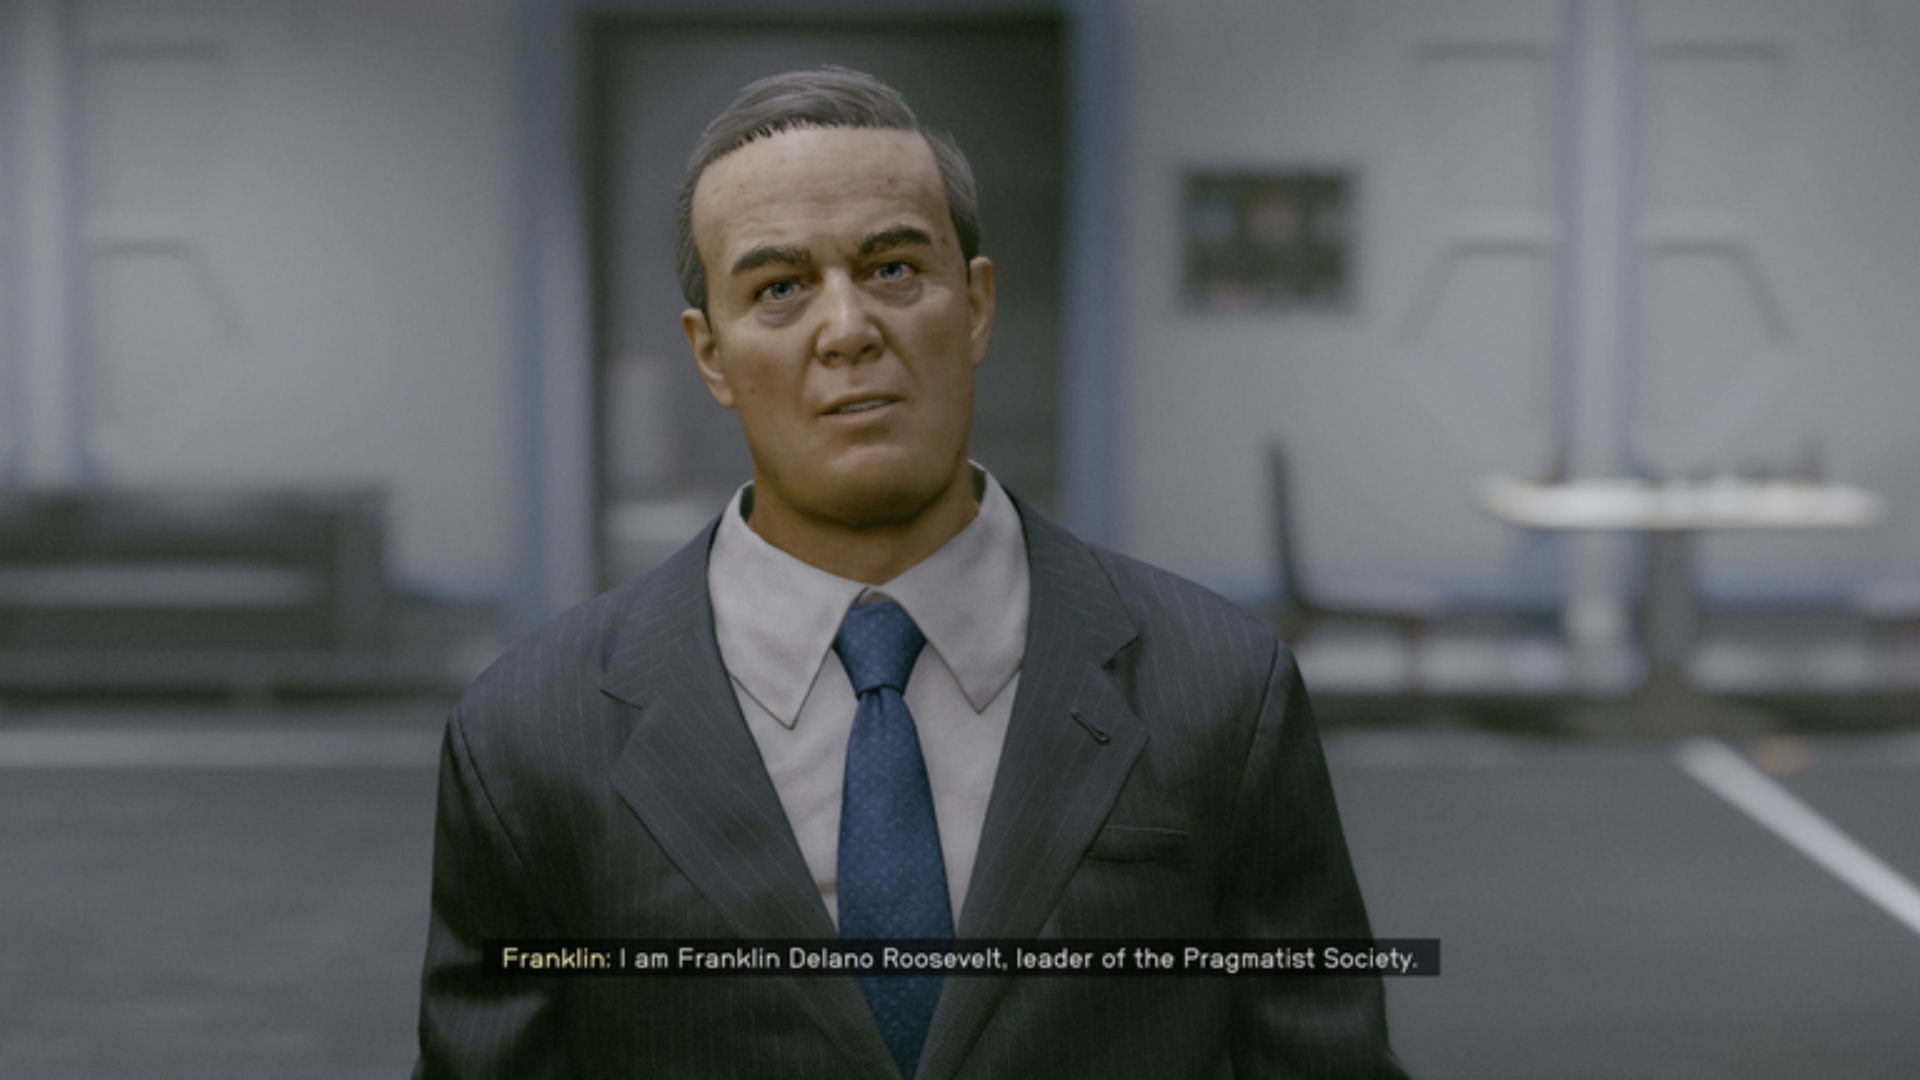
1. Franklin D. Roosevelt – Pragmatist
Franklin believes that the Crucible’s inhabitants aren’t yet prepared to venture into the stars. His plan involves fostering a colony without machines until the populace is deemed ready for interstellar exploration.
2. Amanarinas – Believers

Amanarinas aims to assert control over the Settled Systems by claiming the deeds of her namesake. She tasks you with restoring the Facility and its testing procedures to fulfill her ambitions.
3. Genghis Khan – Renegades

Genghis Khan seeks liberation from the Crucible and proposes achieving this goal by advocating for the outright destruction of the Facility.
Despite the diversity in their beliefs and objectives, all three society leaders request your assistance in inspecting the Facility on Charybdis III.
Additionally, you will be encountered by Amelia Earhart on the left side of Franklin’s building. She will put up the offers to join your crew, presenting an opportunity for recruitment upon mission completion.
Furthermore, when you depart from Franklin, you will encounter Sheriff Wyatt Erap waiting outside the building. Though optional, engaging in this interaction sets the stage for an optional mission.
Optional: The Secret Lives Mission In Starfield
The sheriff will invite you to a clandestine meeting in a cave outside the Crucible, triggering the optional Secret Lives quest. This side quest does not affect the Operation Starseed outcome; it’s entirely your choice to pursue or skip it.
In the cave, Erap claims he’s a clone of the infamous serial killer H.H. Holmes. Now, you can expose this secret to the Crucible’s residents.

Therefore, faced with the fear of prejudice, Erap will try to eliminate you and himself by detonating a fuel canister within the cave. Your response to this situation can unfold in two ways:
1. Attack Erap
Outcome: This option will prompt Erap to ignite the fuel canister, resulting in an explosion. If you survive, you’ll find 2,500 credits added to your inventory.
2. Persuade Erap
Outcome: However, if you successfully persuade Erap, it will build trust, and he will allow you to return to the settlement.
In the second option, you can disclose Erap’s secret to the Crucible leaders. Franklin and Genghis will show understanding, but Amanarinas will turn hostile when you unveil Erap’s identity.
It is recommended to prepare for the explosive gas tank before you enter the cave. You can equip yourself with appropriate protective gear to endure the blast in case persuasion fails or you opt to Attack Erap directly.
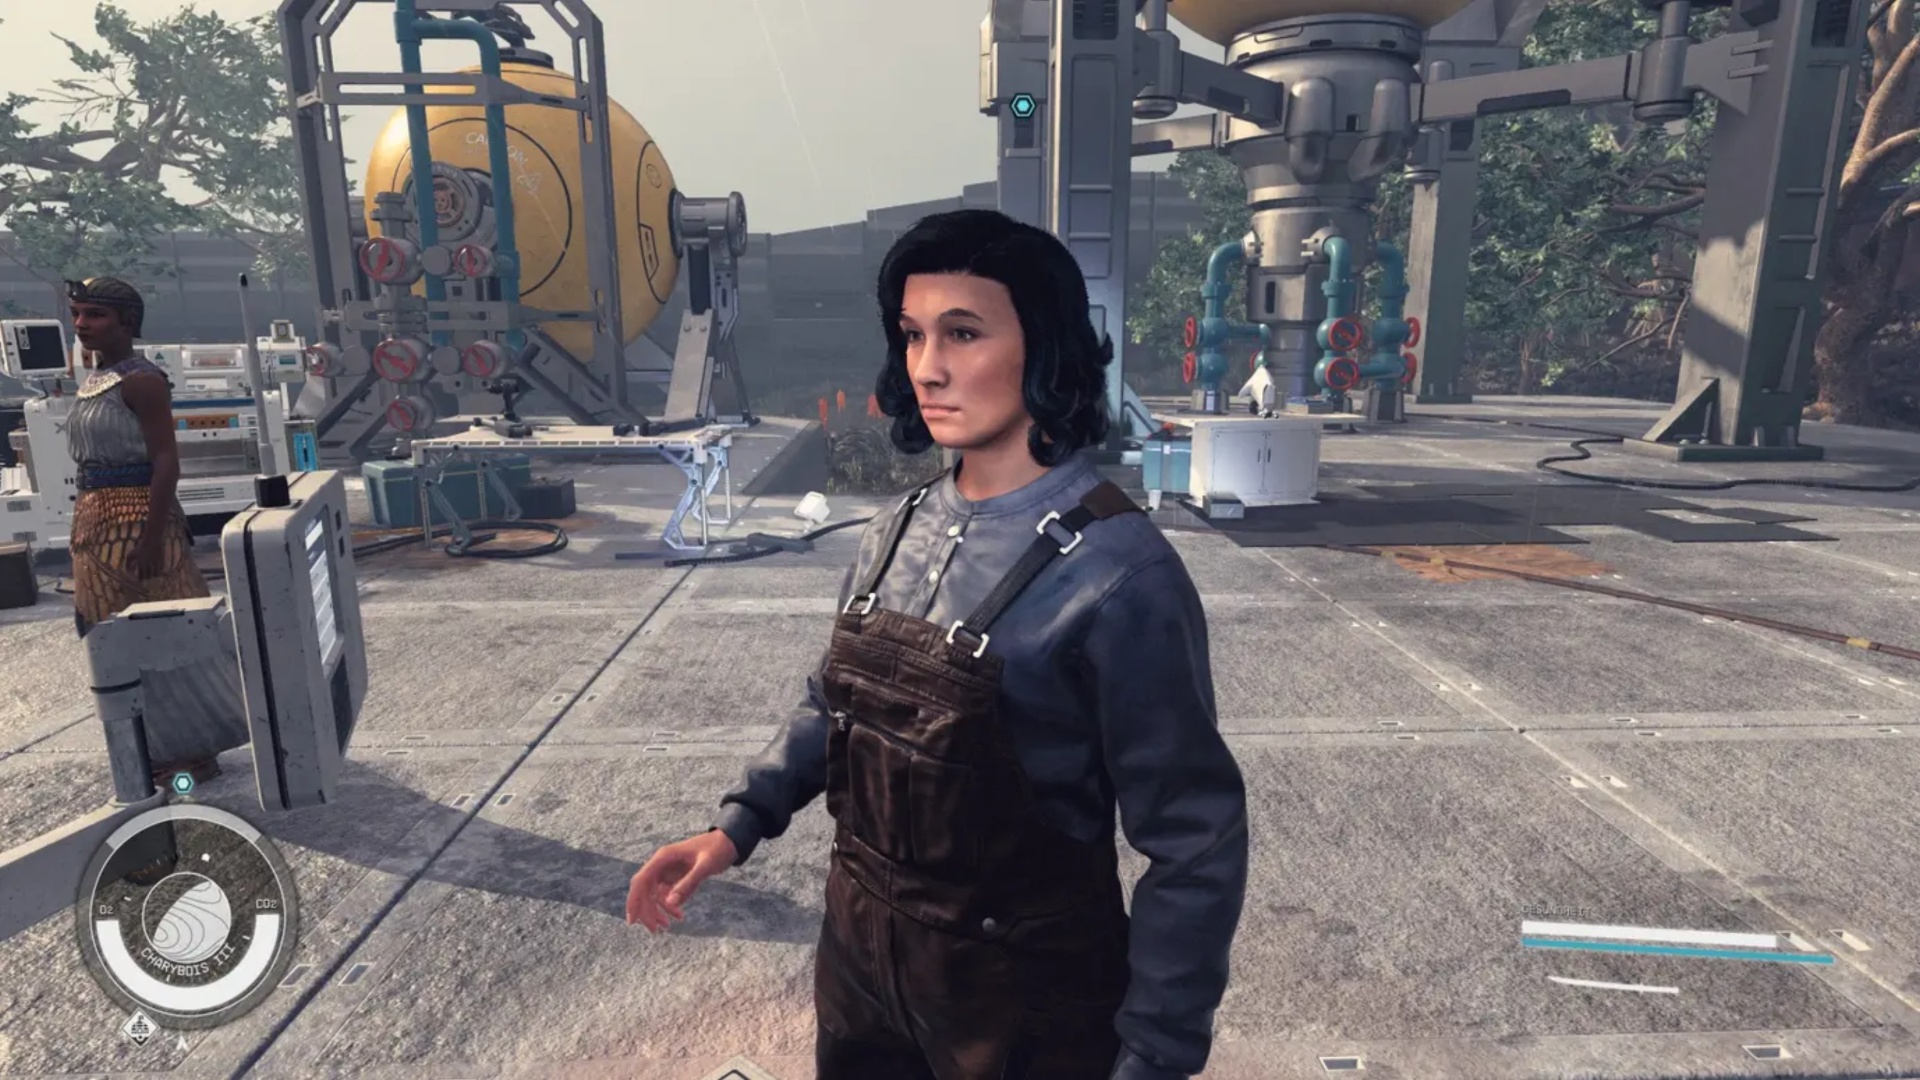
Step 4: Explore The Facility
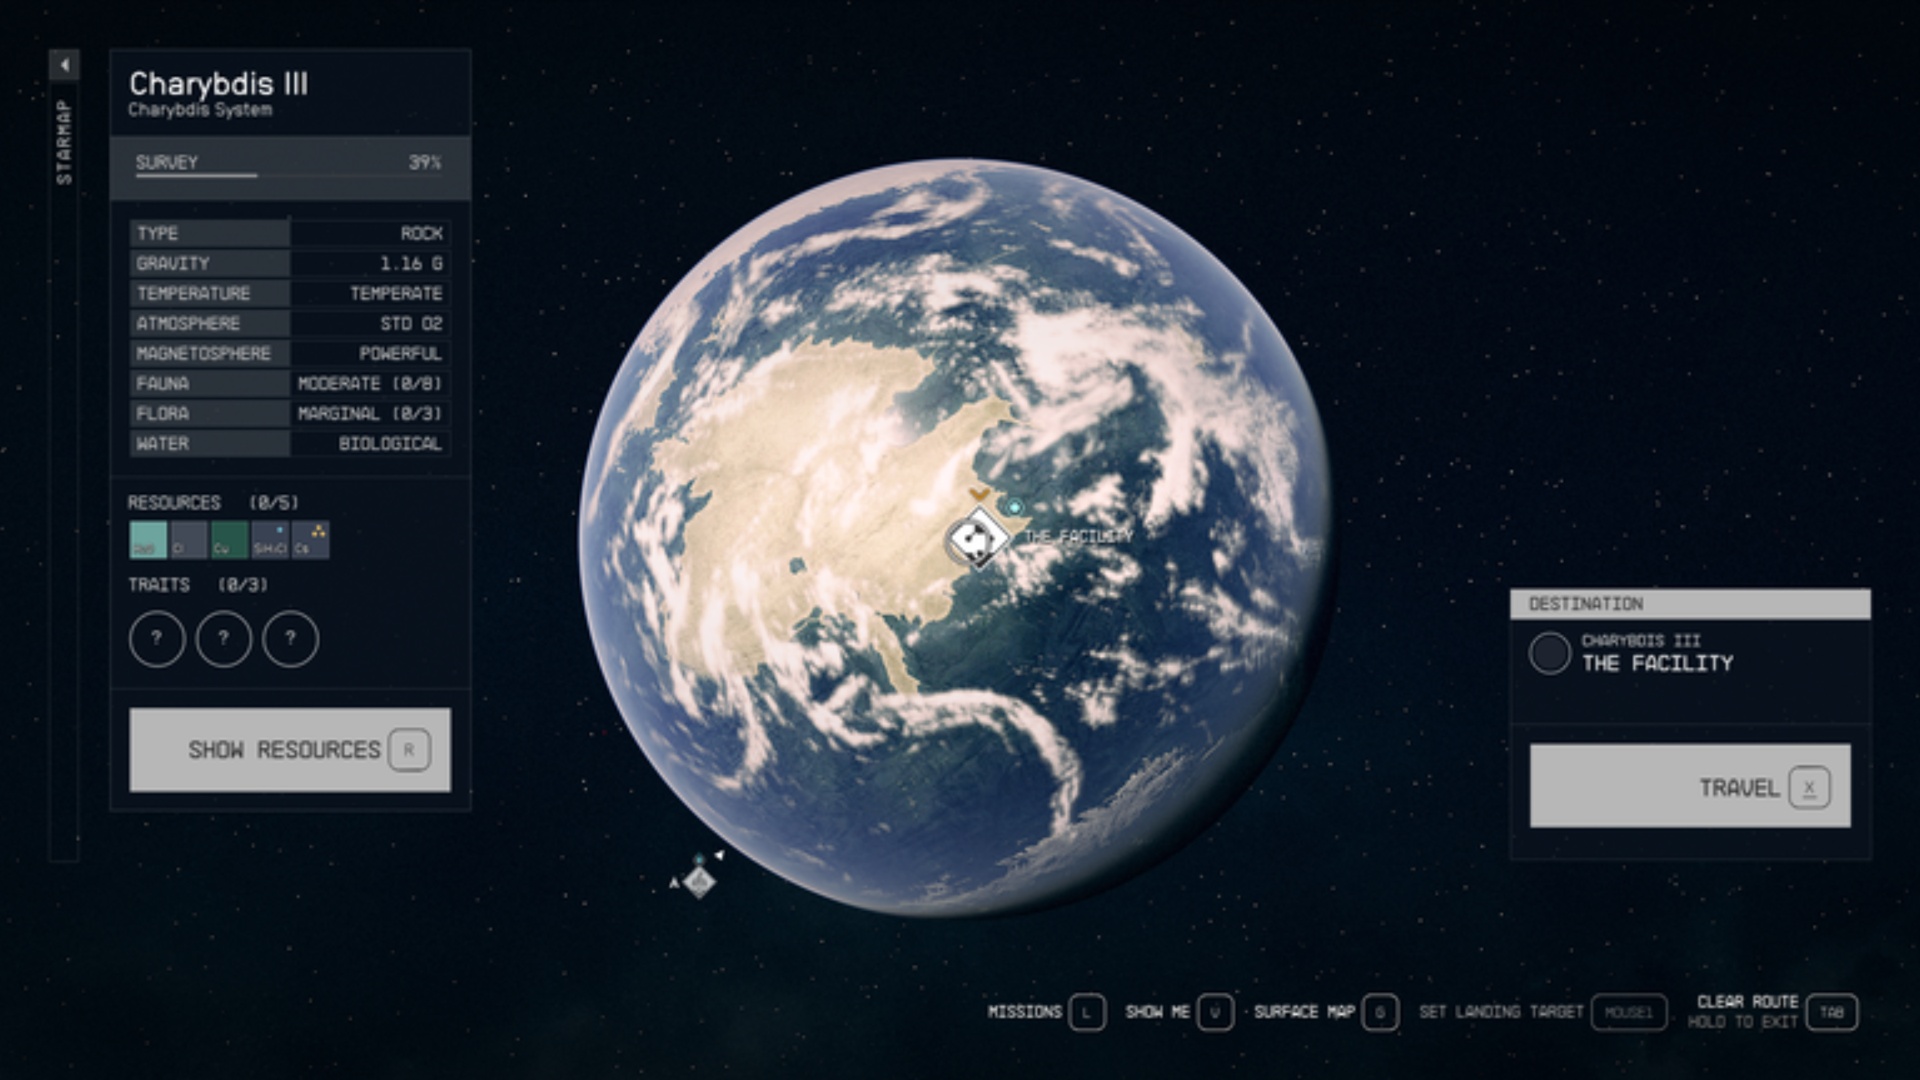
To advance in the quest, navigate to the Facility located on the opposite side of the planet. Next, utilize the blue mission waypoints to track down the seven clues scattered throughout the Facility.
However, the research facility will pose a challenge as it’s infested with aggressive Spaceroaches and Maggotmaws. Therefore, equip yourself for combat as you explore the Facility.
Within the Facility, you’ll realize the necessity of a security override code to access the restricted-wing computer. When you’re done collecting the clues, return to the Crucible to share your discoveries with one of the three leaders.
They will instruct you to rendezvous with Ada to delve into the investigation of the security override code.
Step 5: Reach The Beagle
Ada will reveal that the security override code crucial to the Facility is stored on a Beagle ship and task you with probing the navigation beacon of the Beagle in the Bel star system, subsequently guiding you to the Zelazny star system where the Beagle is situated.
The expedition from the Charybdis system to the Bel system and then on to the Zelazny system spans a considerable distance. Therefore, you need to have a well-equipped starship with a robust Grav Drive.
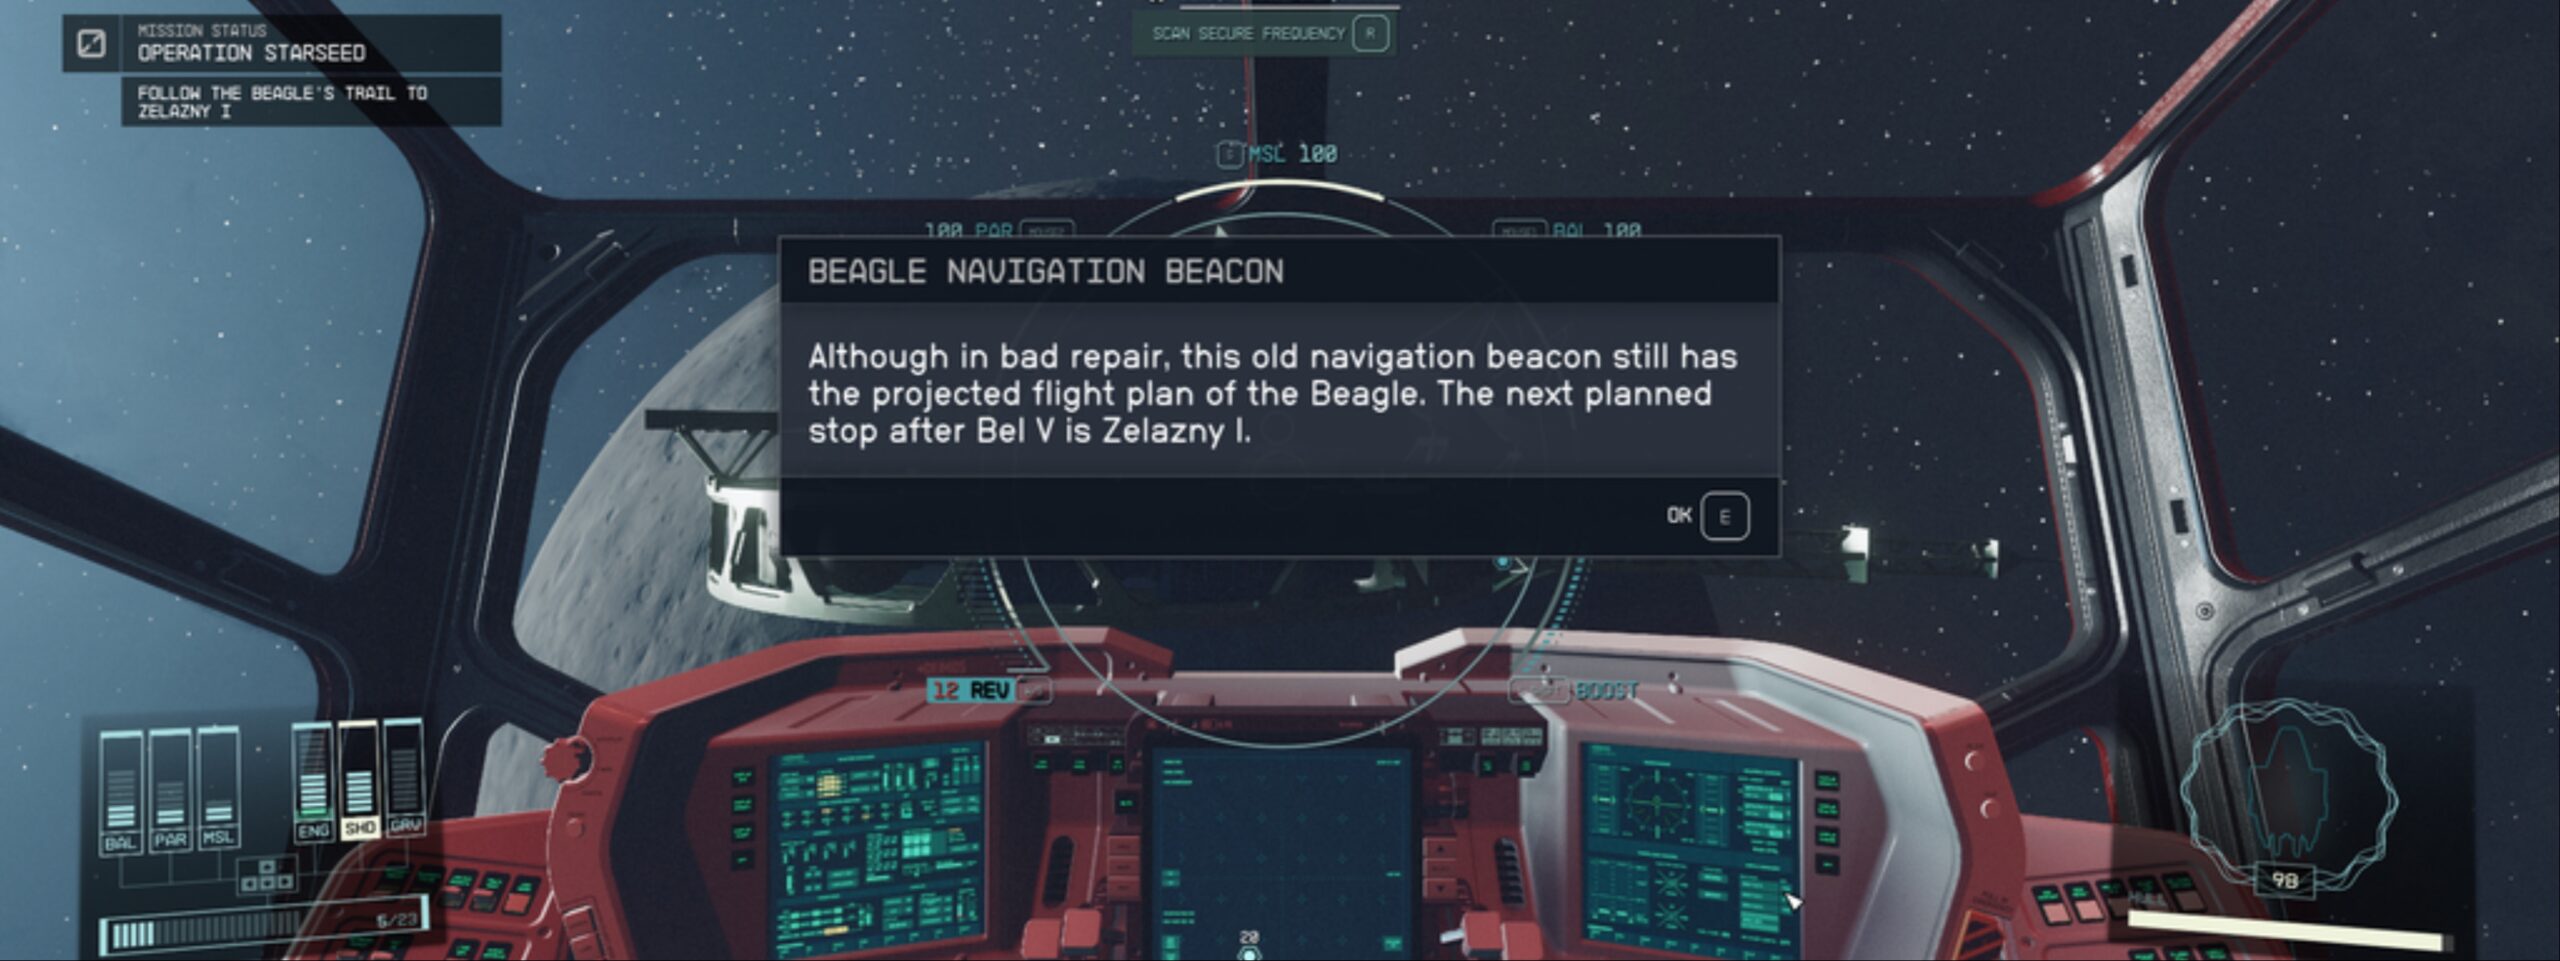
When you locate the Beagle, board the ship and access the data core. Inside the data core, you can download the security override code for the Facility.
In order to unlock access to the Beagle lab’s data core, you need to get the key found on a table in the central area of the left hall after the bedroom section.
It’s important to note that the turrets and robots on the Beagle remain active, so make sure that you are adequately stocked with ammunition before boarding the ship.
Step 6:Choose The Side Of A Crucible Leader
To proceed, you need to head to Ada to conclude your conversation with her and return to the Facility. Simply talk to her and let her decrypt the Override Code.
The final pivotal decision awaits as you access the Data Core computer for an emergency reboot. You will have different options available; here are your options and the corresponding rewards:
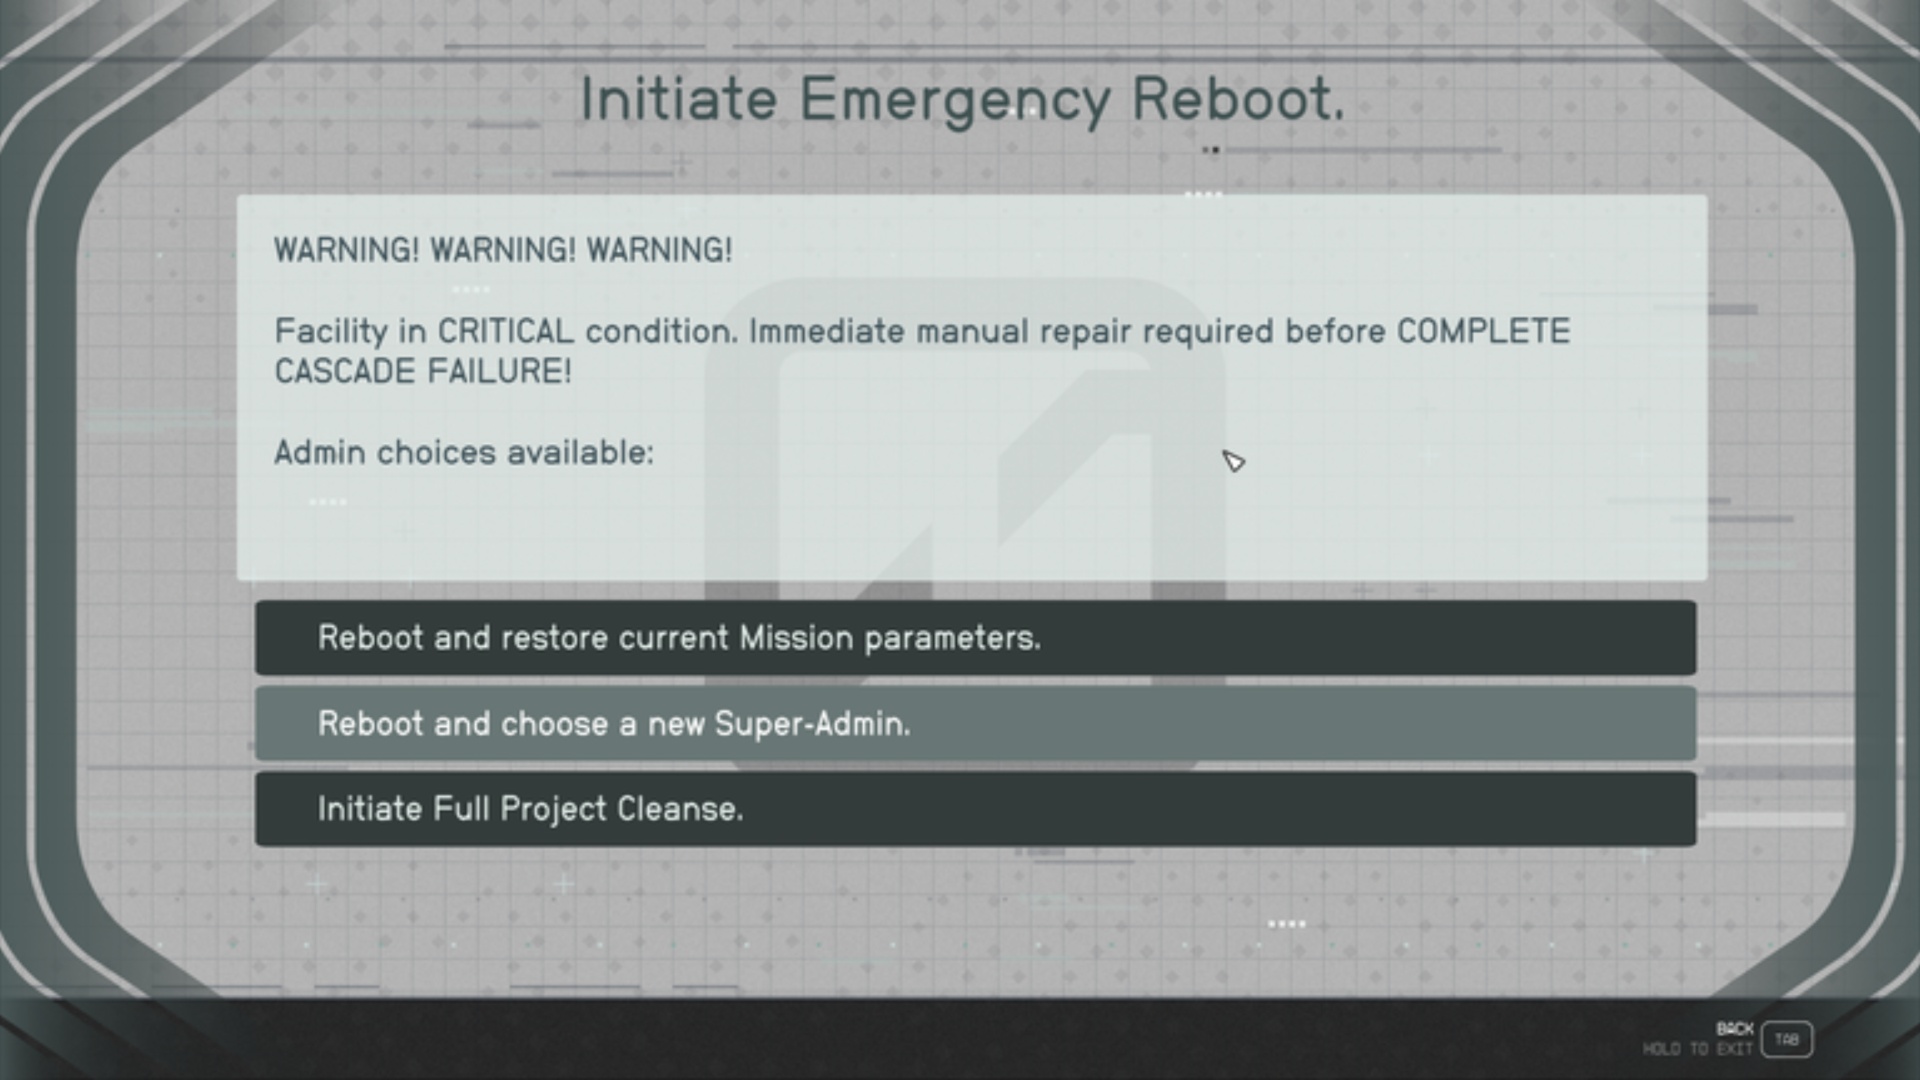
1. Initiate Cleansing
- Effect: This choice results in the termination of all clones in the settlement. However, in this choice, recruiting Amelia Earhart becomes impossible.
- Rewards: You will be rewarded with 2,000 credits and XP. Additionally, you can loot items from the inhabitants of The Crucible.
2. Reboot and Restore Parameters
- Effect: The settlement remains unchanged, and you retain the ability to recruit Amelia Earhart.
- Rewards: Opting for this decision grants you 3,000 credits and XP.
3. Reboot and Choose a New Super-Admin
- Effect: This choice lets you hand control of the Crucible to one of the remaining leaders in the settlement. You still have the opportunity to recruit Amelia Earhart.
- Rewards: Selecting this option awards you 6,000 credits and XP.
If you opt for the first ending, you can gather outfits for your character from all the leaders in the settlement. Therefore, make your decision wisely, as it will shape the final outcome of the quest.
This concludes the Operation Starseed Starfield quest; however, while you’re at it, do make sure to check out our comprehensive guide, 2024 Upcoming Video Games Release Schedule For PC, Xbox, And PS5.
Hi, I’m Matthew Wilkins, a dedicated gamer and seasoned journalist holding a Communicative English degree from Chapman University. With over 8 years of hands-on gaming experience, I bring a wealth of knowledge to GAMINGFLAWS. Throughout my career, I’ve been a trusted guide for many, navigating the ever-evolving landscape of the gaming world. Follow me for more expert insights into the gaming universe.


![How To Get Ros Arago IV Legendary Auto Rifle Weapon In Destiny 2 [Complete Guide]](https://ciceropost.com/wp-content/uploads/Destiny-2--768x420.jpg)